Friday, May 15, 2015

Travel Hack Friday: How to Make a Paracord Bracelet

Welcome to Another Travel Hacks Friday. As part of a new series, every Friday, we will be introducing new travel hacks for outdoor and urban adventures. We will scour the web for the best and most practical hacks, as well as dig into our reserves and share our own awesome moments of ingenuity!


Paracord is such an amazing and useful piece of gear, that in order to do it justice, I’m going to split this hack into 3 parts.


This is Part 2 of the Paracord series.  If you want to learn more about why paracord is so awesome, and you haven’t yet read part 1:  How to Make a Paracord Belt


Last week I showed you guys how to craft a belt using nothing more than paracord and a buckle. This week I’m going to show you all how to make a paracord bracelet to go along with that nifty new belt of yours (you did make the belt right?). Remember, it’s all about accessorizing. If you’re going to do something, do it with style!


There are a lot of instructions that utilize two separate pieces of paracord for the bracelet, but from a usability standpoint, this isn’t the best method. Two separate lines create a weak spot in the paracord and also diminishes the overall useable length.


You can size it for your wrist, but keep in mind the smaller the wrist the less overall paracord length you’ll have at your disposal. For most, 10 feet of paracord will be standard. However, this isn’t set in stone, as there are ways of increasing length while keeping the overall diameter the same. I’ll get to that in a second. It’s better to create the bracelet based on how much cord you want to bring with you as opposed to wrist size. Of course this is within reason. If you plan on bringing 30 ft plus, it makes more sense to consider the paracord belt instead.


Also, generally I do prefer the belt, only because the bracelet just doesn’t have enough length for it to be useful in demanding situations. But this doesn’t mean it doesn’t serve a purpose, as you’ll see in my list of uses for paracord.


There are two methods when making your paracord bracelet.


How to make a Paracord bracelet method 1:


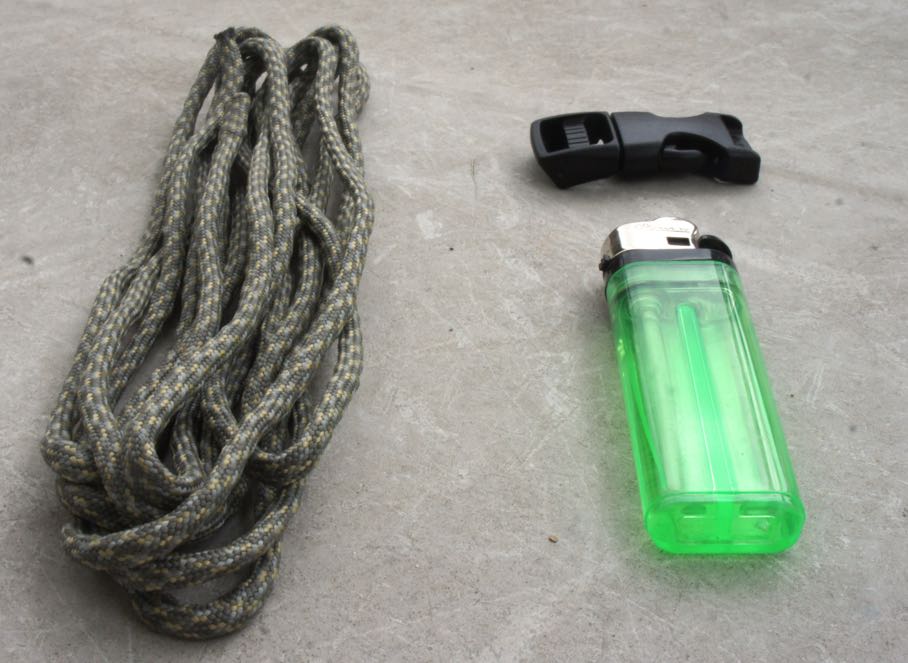
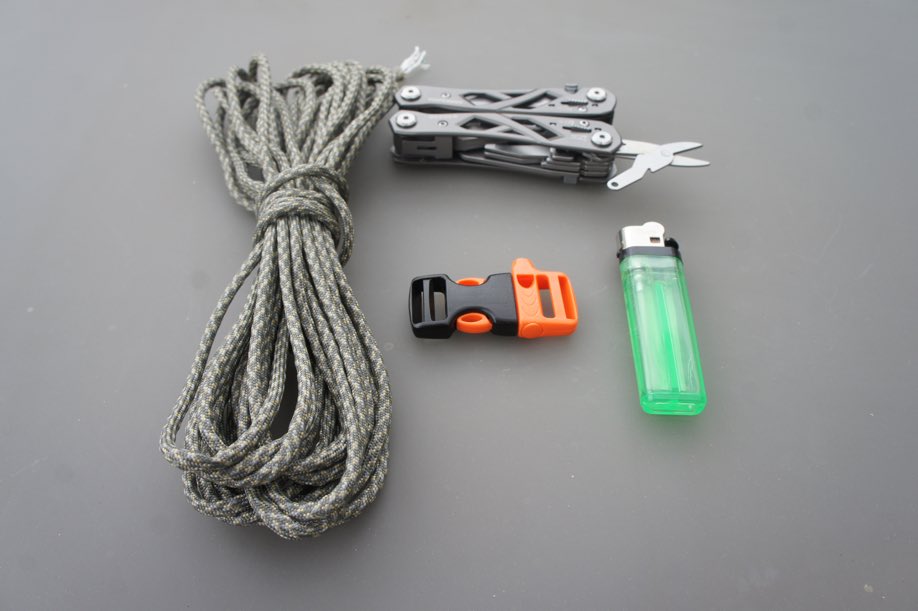
Materials/Equipment


  1. At least 10ft of paracord 550

  2. Buckle or clip

  3. Lighter

how to make a paracord bracelet


For our example we used about 10 feet of cord and made our paracord bracelet for an 8” wrist circumference.


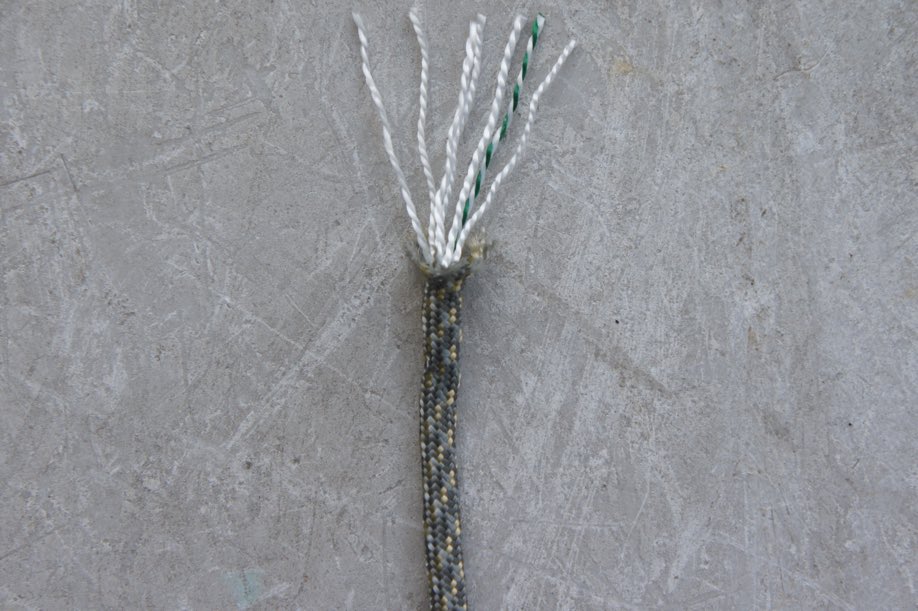
1.Cut a piece of paracord about 10 feet in length and seal off the ends with a lighter


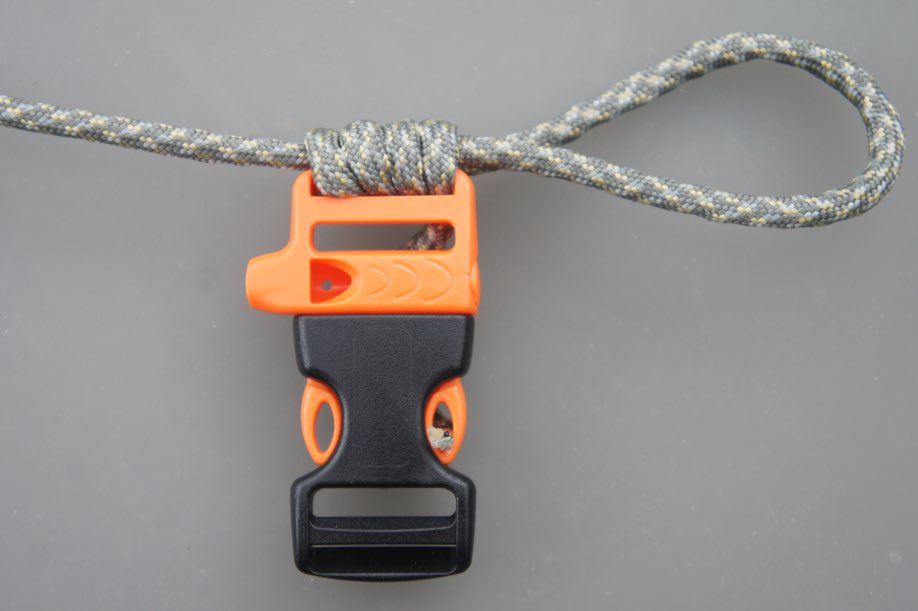
2.Fold the paracord exactly in half, creating a loop on one end
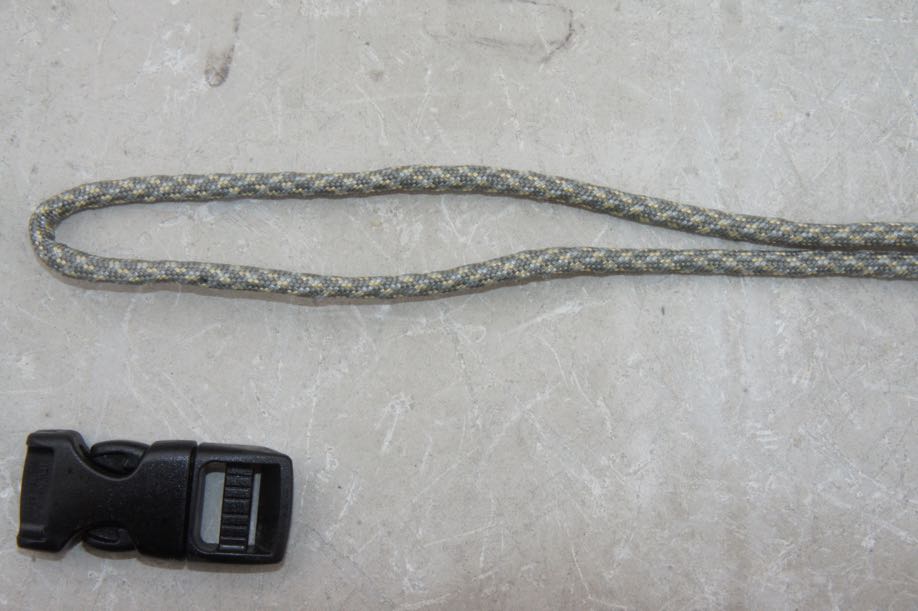

how to make a paracord bracelet


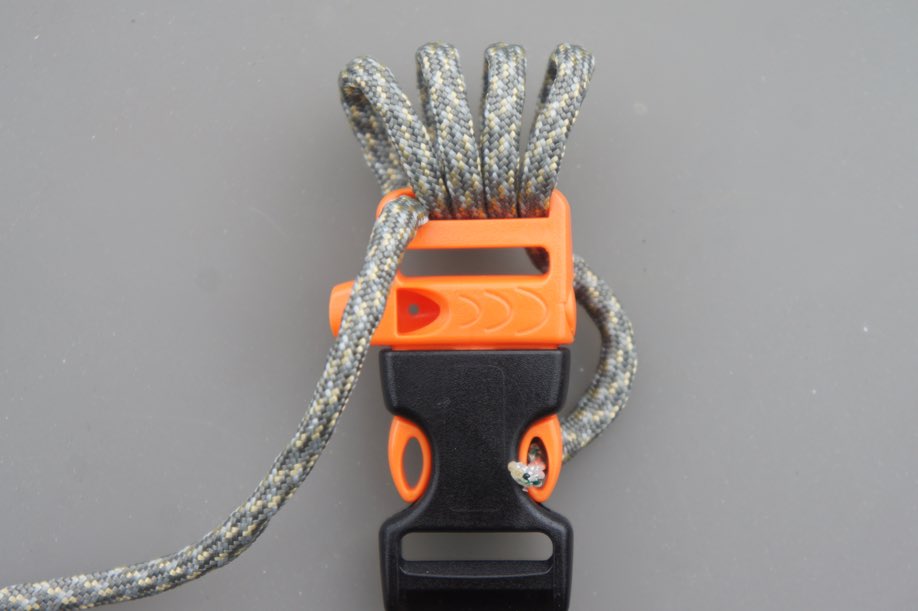
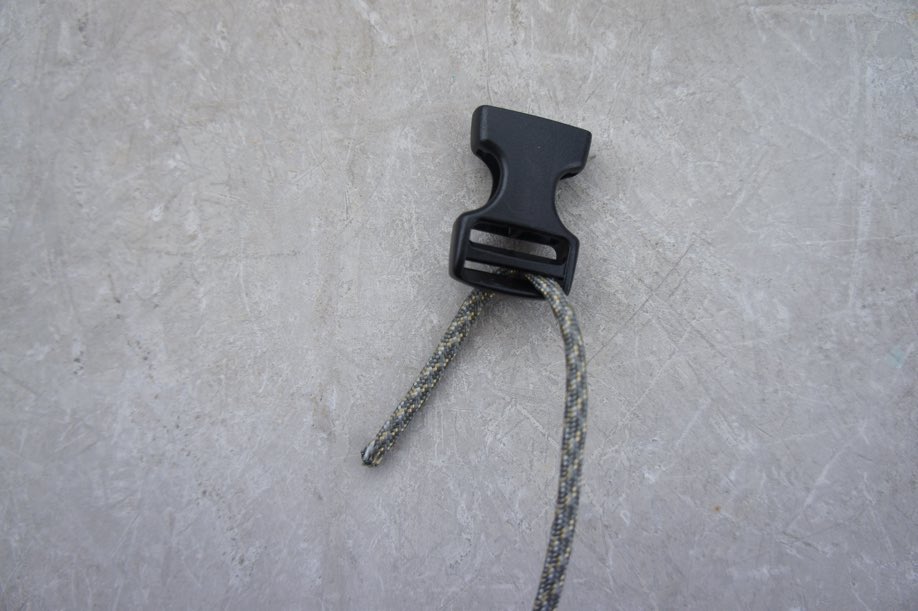
3.Open the buckle and take any of the two sections and run the looped end of the paracord through the buckle,


4.Thread the loose strands through the loop and tighten
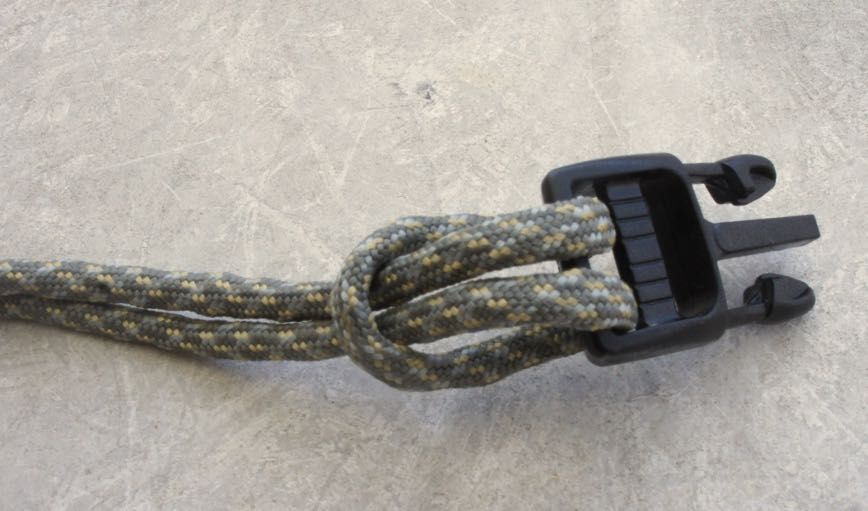

how to make a paracord bracelet


5.Wrap the paracord, buckle end, around your wrist to get the size. Preferably, keep it a little loose, because as you create the bracelet, the paracord will tighten
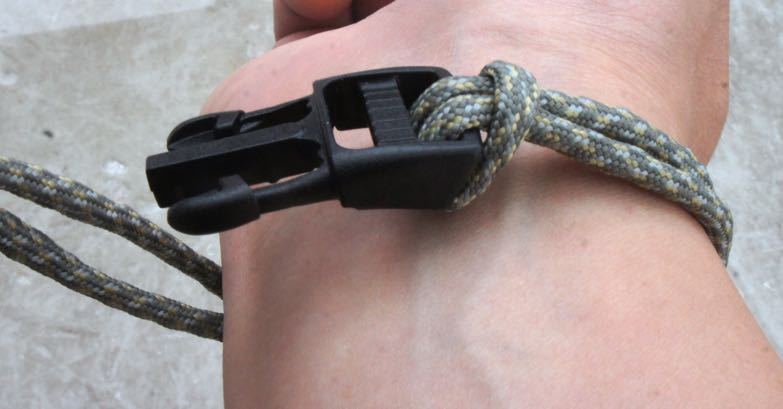

how to make a paracord bracelet


6.Mark the length of the circumference from step 5. This mark will be where you begin tying the bracelet


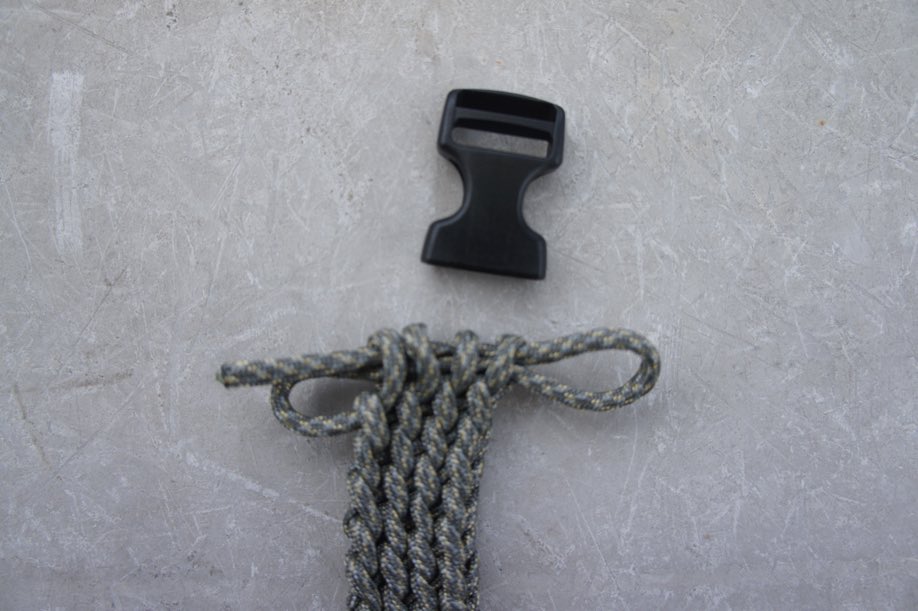
7.Take the other half of the buckle from step 3, making sure it is positioned properly to lock with the other buckle half, and thread both open strand ends through the buckle until it reaches the mark in step 6. Make sure the length of both ends are still the same.


how to make a paracord bracelet


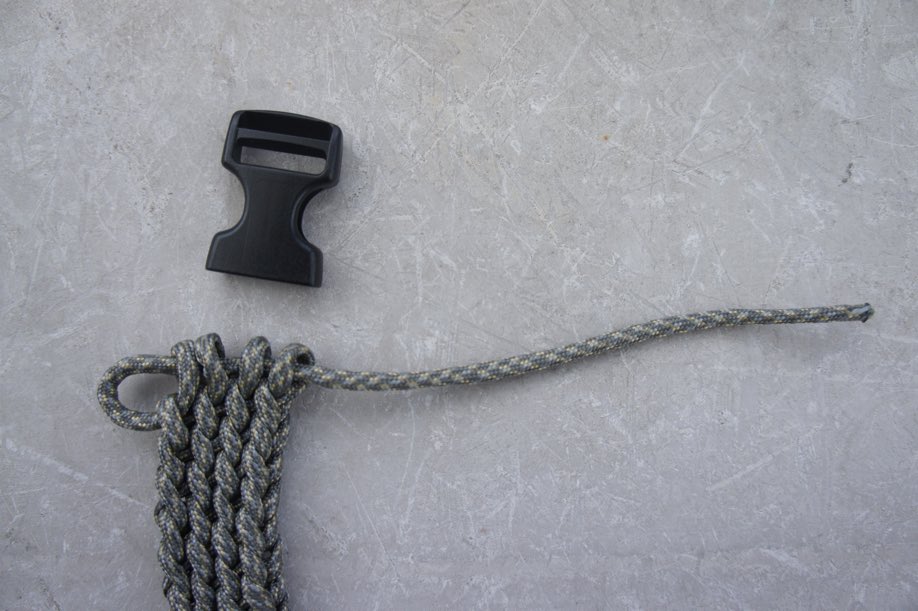
8.Thread the open strand ends through the first buckle in step 3 again. We sized ours for an 8” wrist circumference, so for a smaller wrist size, you can thread it a 3rd or even 4th time alternating between buckle ends. However, the more you thread, the bigger the buckle you’ll need. For larger wrists, you can skip this step entirely.  Also, if you want to use a longer piece of paracord, and still keep the same circumference, just keep threading it over and over.  Again, you’ll need a larger buckle the more times you thread the paracord.
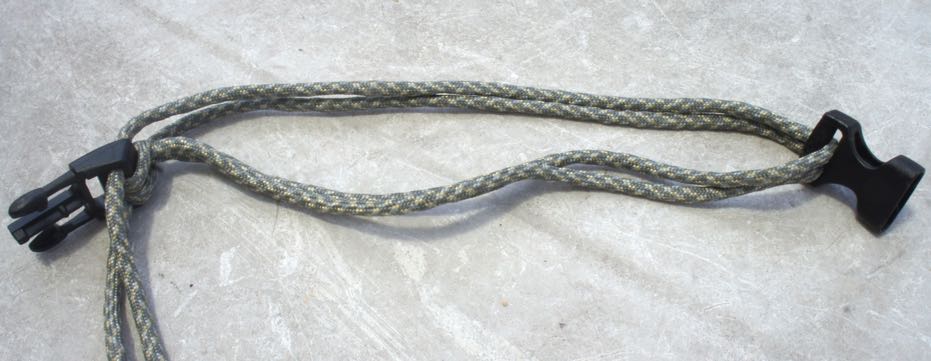

how to make a paracord bracelet


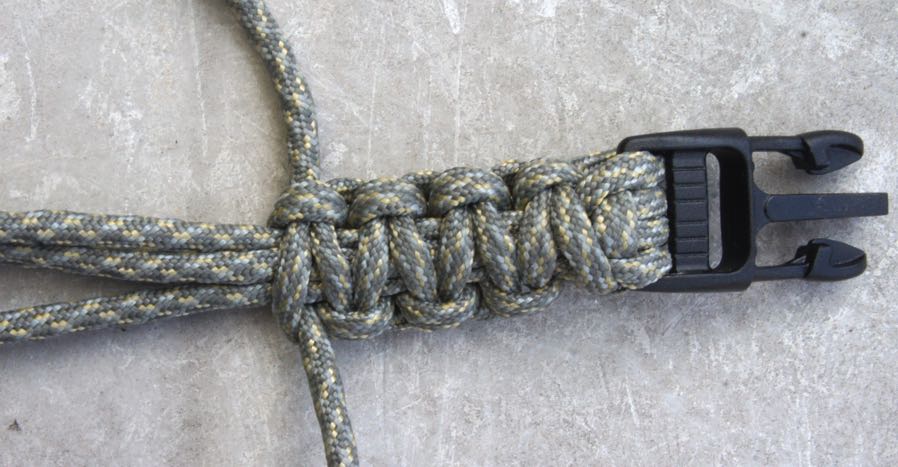
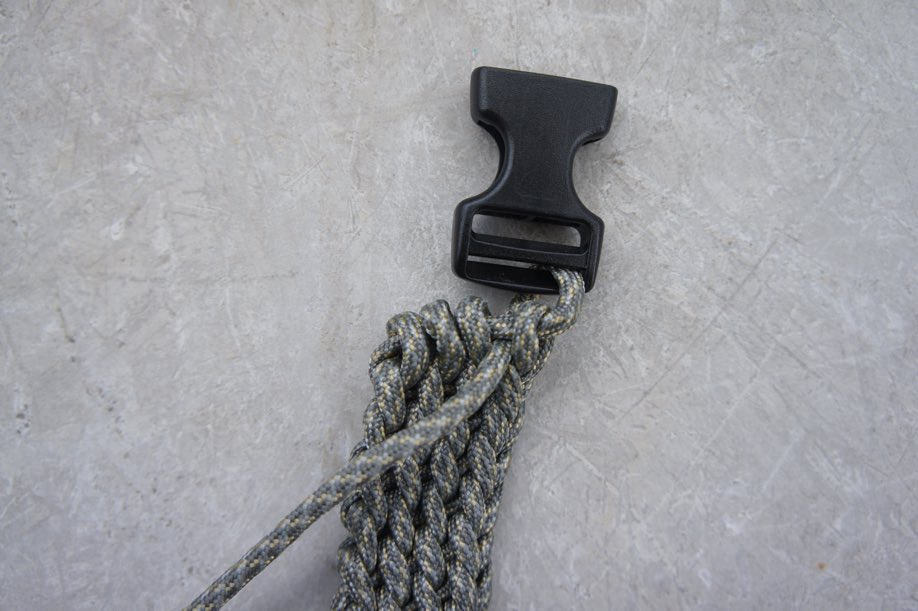
9.Separate the two open strands of the paracord, with one side to the right (Strand 1), and the other to the left (Strand 2).
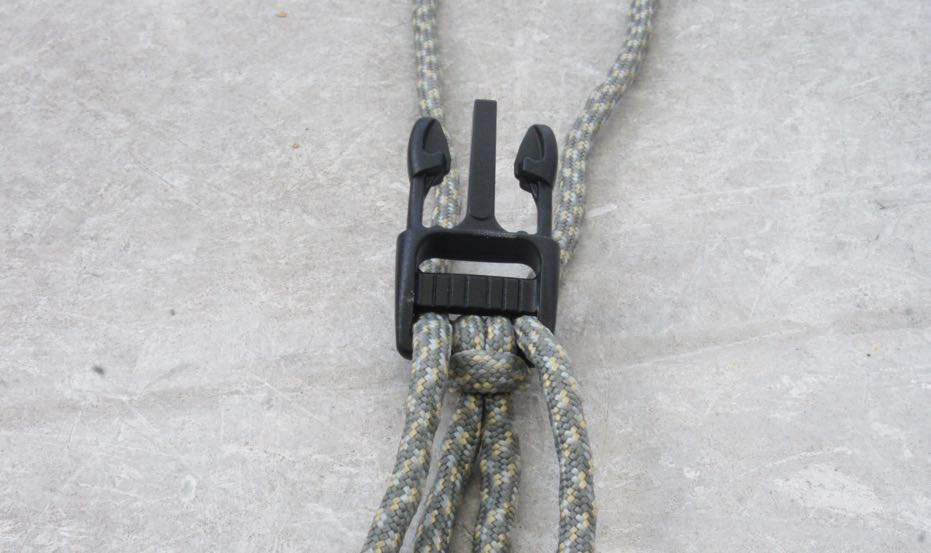

how to make a paracord bracelet


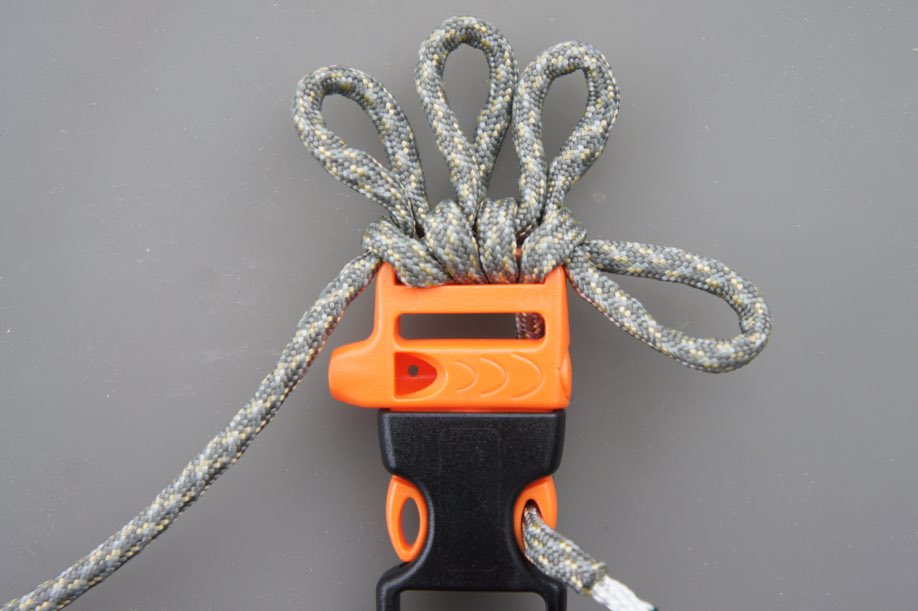
10.Now start weaving the ends together. Take strand 1 and bring it under the center loop and cross it over strand 2
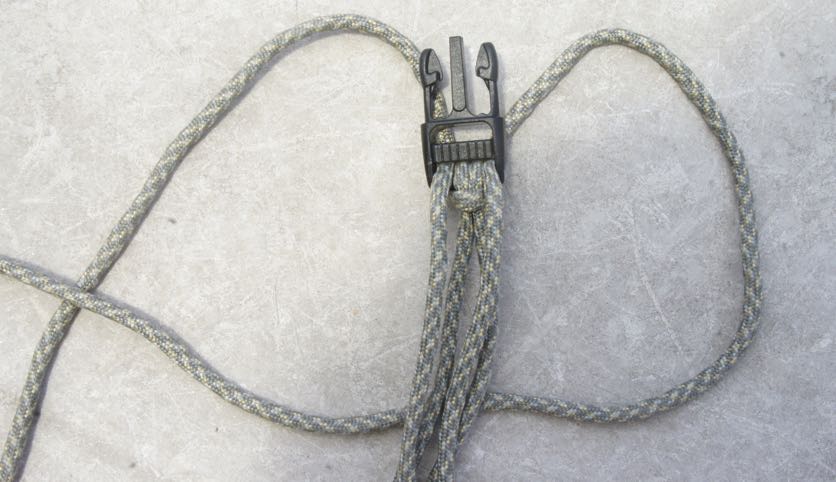

how to make a paracord bracelet


11.Take strand 2, and bring it over strand 1 and over the center loop and then through the loop created by strand 1
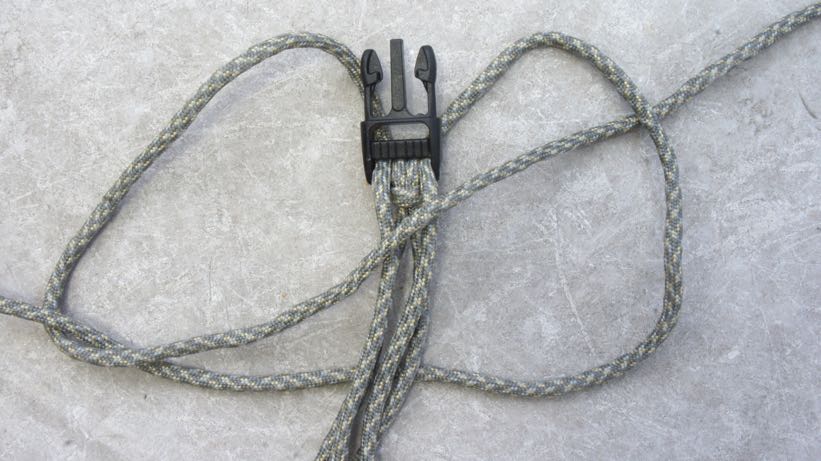

how to make a paracord bracelet


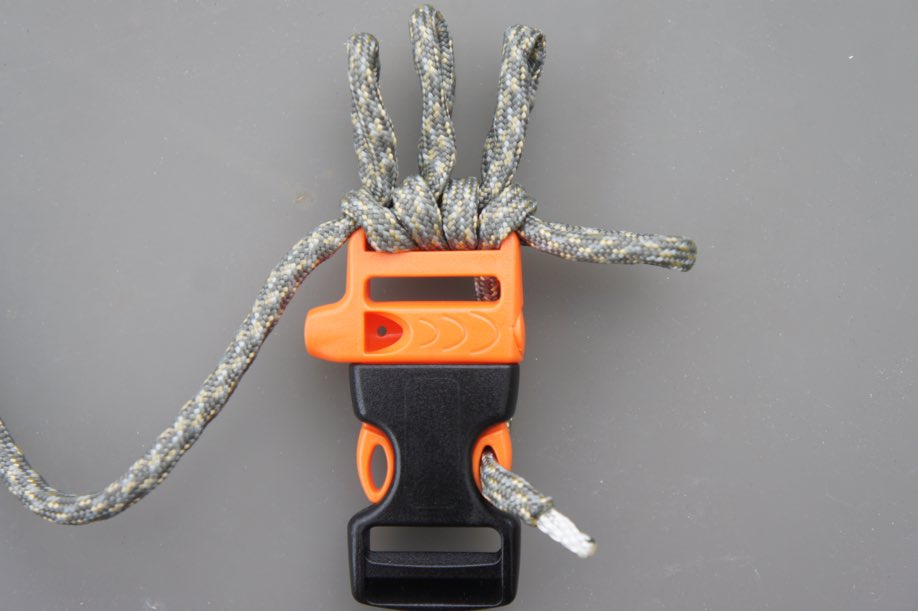
12.Now pull the ends of both strands to tighten, making sure the knot is below the buckle. It will be a bit off on the first knot, but don’t worry, as you thread it will begin to fall into place
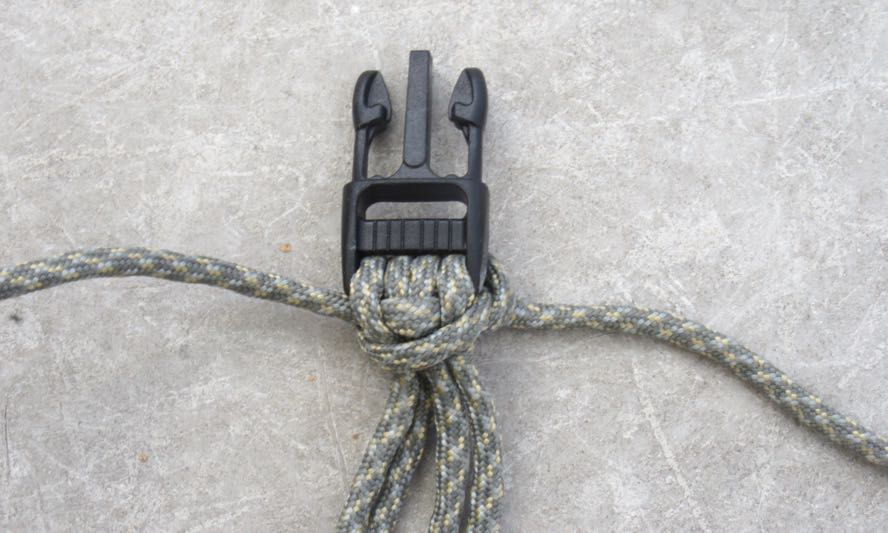

how to make a paracord bracelet


13.Take strand 1 again, which will now be on the left side, and bring it under the center loop and cross it over strand 2 on the right
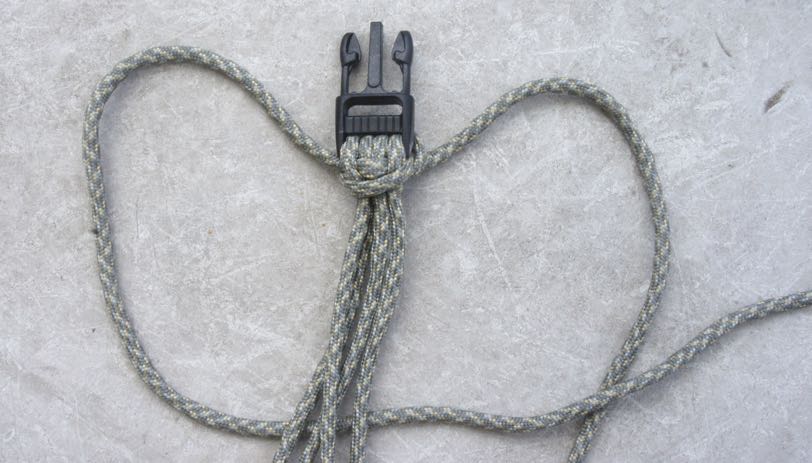

how to make a paracord bracelet


14.Take strand 2, which will now be on the right side, and bring it over strand 1 and over the center loop and then through the loop created by strand 1
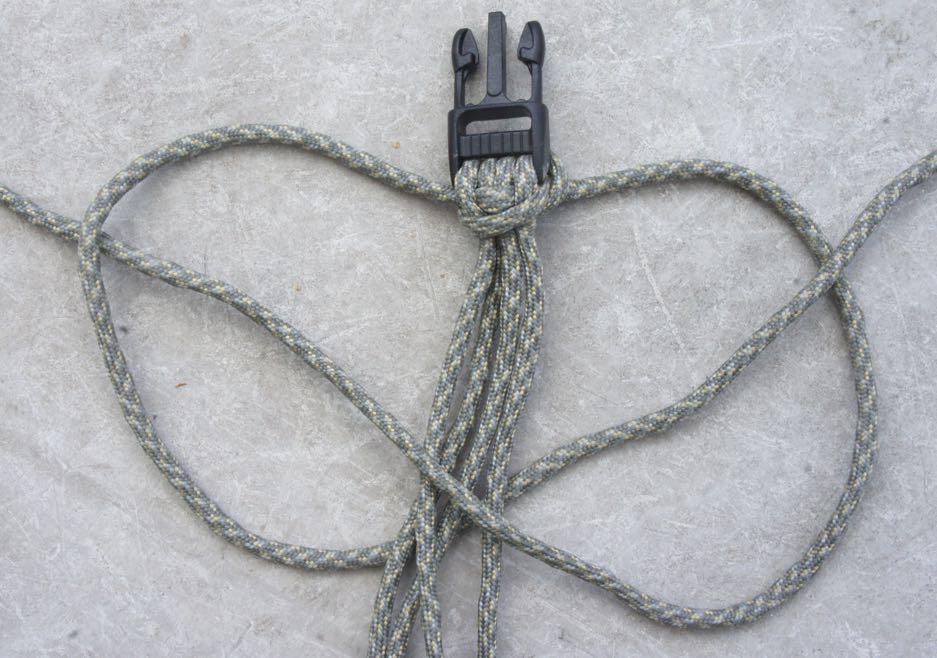

how to make a paracord bracelet


15.Pull both ends of each strand to tighten
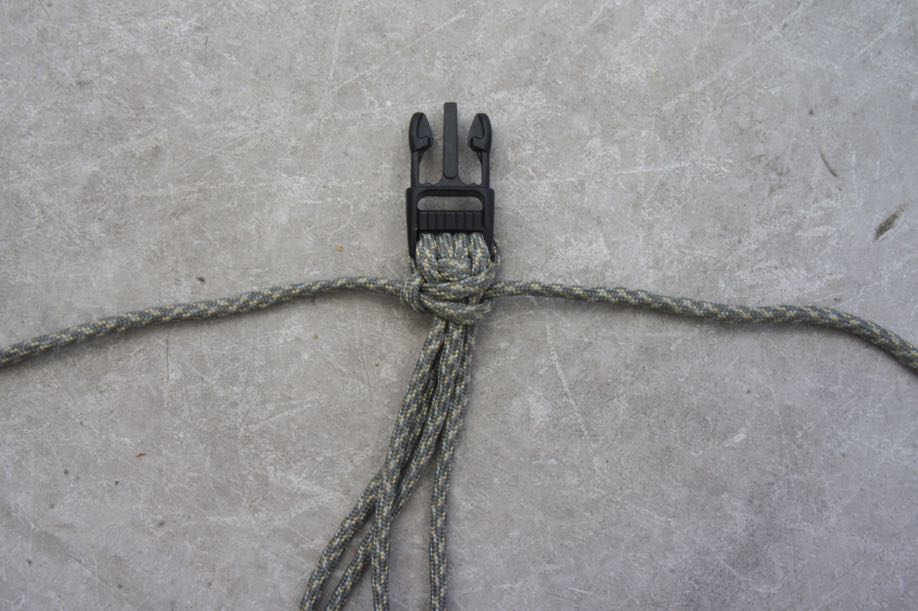

how to make a paracord bracelet


16.Rinse and repeat from step 10


how to make a paracord bracelet


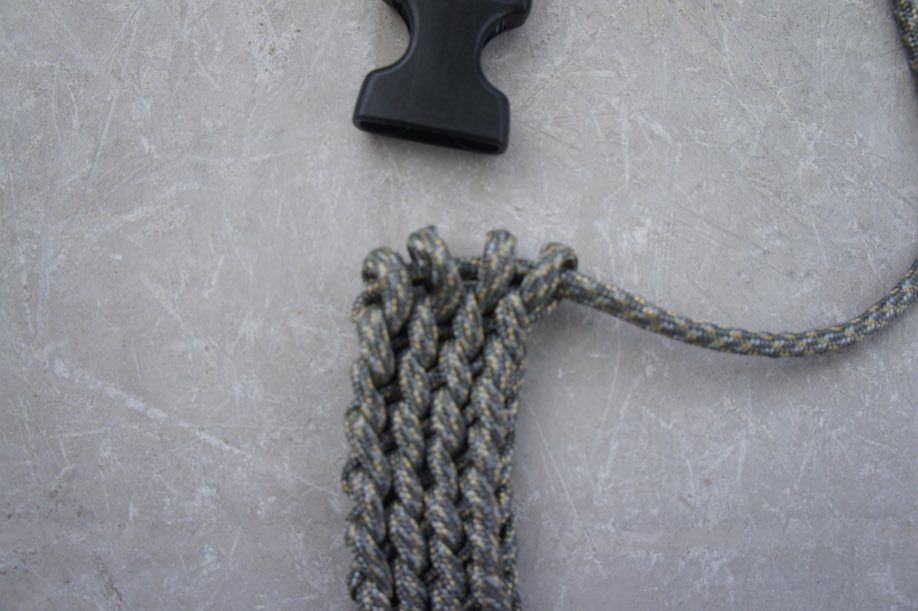
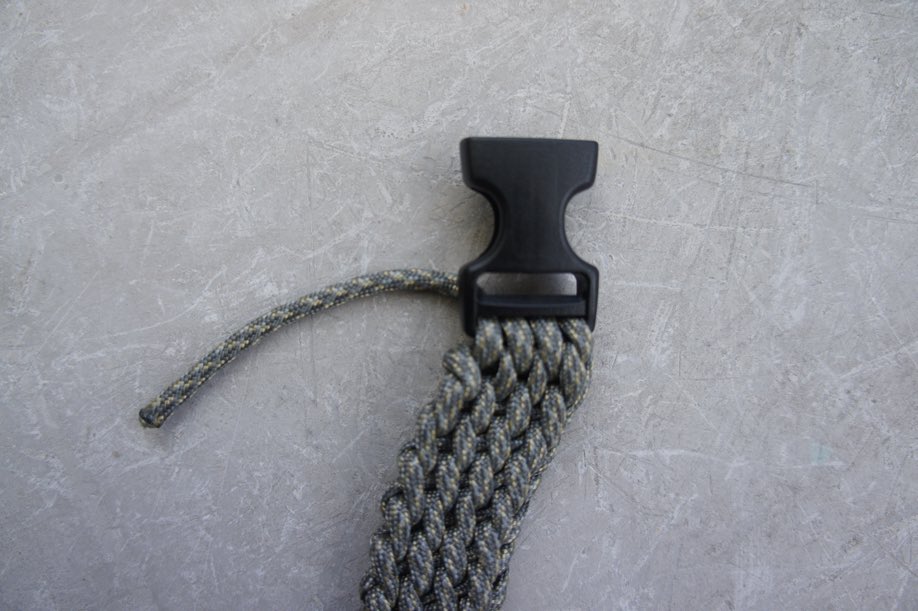
17.Weaving will be complete once you’ve either run out of paracord or have reached the other buckle


18.Pull and tighten


20.There are two options to complete the cord 1) stick the excess cord under one of the knots, and seal off with a lighter, 2) tie the excess cord using a simple overhand knot
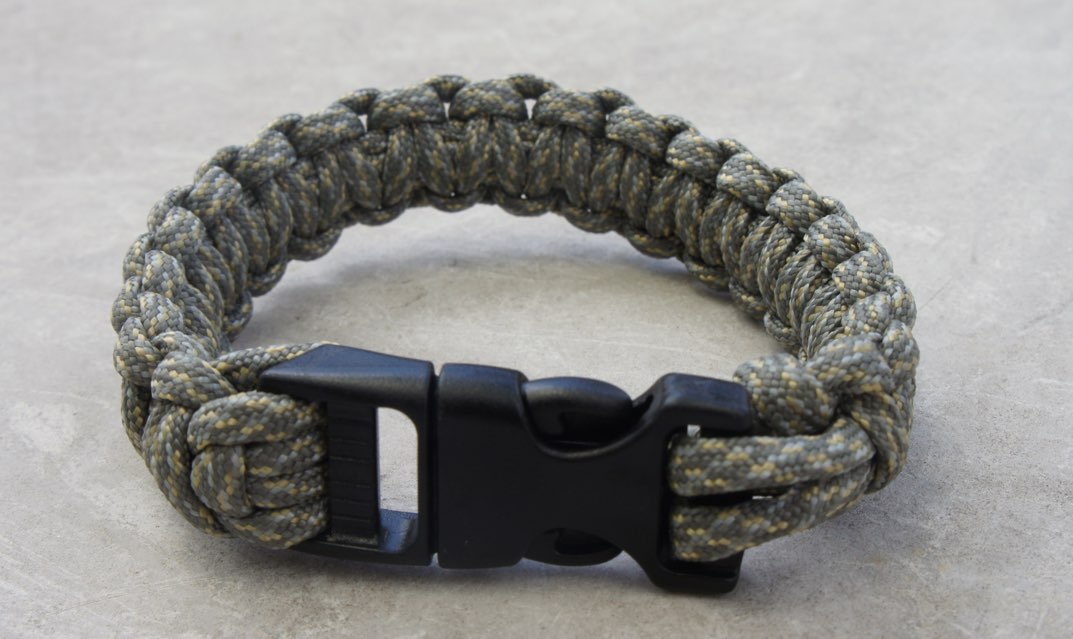

how to make a paracord bracelet


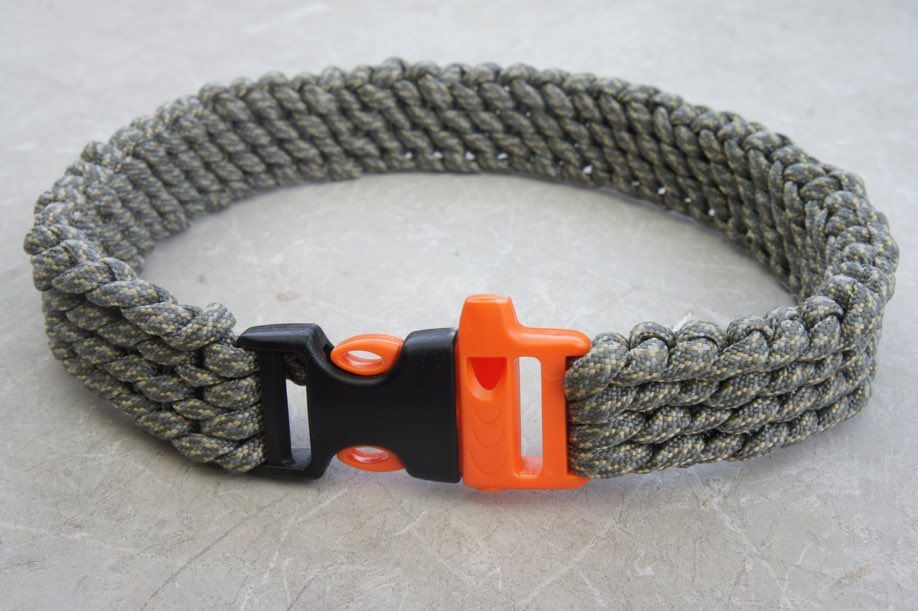
Voila, you now have a perfect set. If you find you have too much excess paracord, or not enough, go back to step 8 and fiddle with the number of times you thread through the buckles or increase the amount of paracord. It’s always better to have more than not enough.


How to make a paracord bracelet method 2:


Materials/Equipment


  1. At least 10ft of paracord 550

  2. Buckle or clip

  3. Lighter

how to make a paracord bracelet


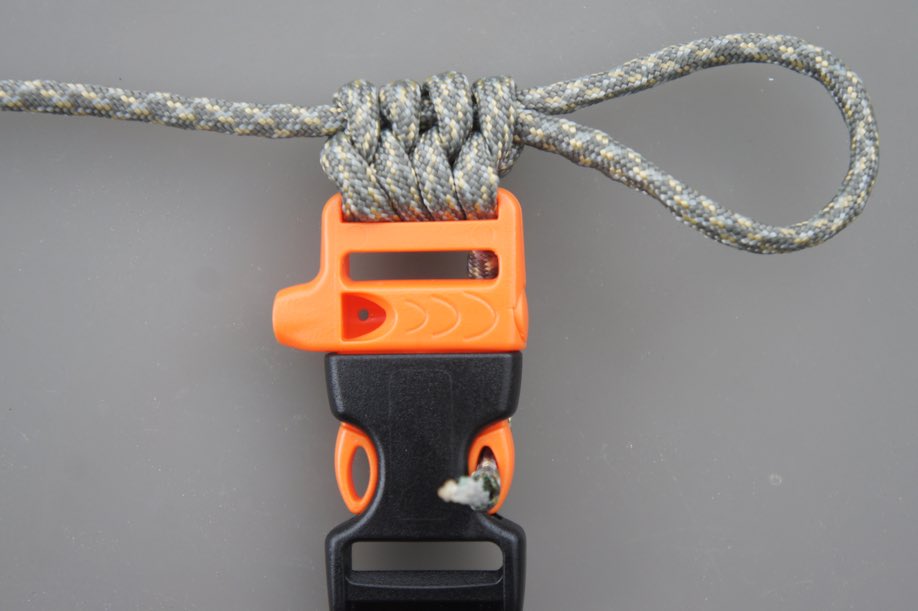
This method works for greater lengths of paracord. Follow the exact same instructions used to make the paracord belt, but with a smaller buckle suitable for your wrist. But once you begin exceeding lengths of 30 feet or more, it’s probably better just to make the paracord belt.


You can find the instructions here: How to make a Paracord Belt


The most difficult part of the paracord bracelet is getting the perfect size for your wrist. Unfortunately there isn’t a universal rule that can apply to all paracord lengths, sizes and fits that I can think of, but just follow the instructions and do a couple of test runs, and you’ll get it.


Next week we will cover the many uses of paracord!


Travel Hack Friday: How to Make a Paracord Bracelet

Wednesday, May 13, 2015

Adventure Series: Eat Sleep Breathe Travel

Have you met Hannah yet? Cake decorator by day, intrepid adventurer by night, she’s a dedicated female solo traveler who throws caution to the wind. She’s been stalked, chased by whip wielding locals, and was left for dead by Asian tourists! A self-proclaimed travel addict, and lover of ketchup, Hannah will risk it all for that perfect Panda photo op. She has made it her personal mission to travel the world and leave no stone unturned in the process. Follow her and get to know her at Eat Sleep Breathe Travel, I promise you will be entertained…


Tell me us about Eat Sleep Breathe Travel.  Who are you, what are you all about, number of countries you’ve visited, and your first introduction to traveling?


Eat Sleep Breathe Travel started in 2012 as a journal of sorts. It had been nearly a year since my first trip abroad to live in Ireland and travel through Europe. I had all these stories and adventure but no one to tell them too. Like every other travel addict out there, I think we can all agree that non-travel inclined friends just don’t care as much as we want them to. So I created a free blog, wrote about my adventures and hoped that maybe someone would find them and read them.


It was only last April/early May that I decided to take the leap and create Eat Sleep Breathe Travel as a resource and a brand. I was just home from a two month trip in Europe that allowed me to complete and exceed my 25 by 25 goal (27 now) and after so much positive feedback from readers and fellow travelers I decided to take the plunge. Nearly a year later I’m happy to say my website still has plenty of the funny stories and confessions I started with, but also a lot of travel tips, destination advice, and inspiration for other solo and female travelers.


What inspired you to forgo the University Degree unlike so many others, and pursue to live a life of travel? (I love Indiana Jones too!)


INDIANA JONES FANS UNITE! Haha! Honestly, I loved my time at university but as cool as studying psychopaths and serial killers was (my degree is in Criminology) it was never my dream. I tried it, I worked with in the victim’s field for a little over two years, but I wear my heart on my sleeve and dealing with those stories in real life isn’t quite as bad** as it seems on T.V. Basically, I burnt out. In fairness, it’s never what I really wanted anyway. I gave it a shot, it was good while it lasted and I loved that I did make a difference, but I can pretty much guarantee I’ll never go back.


So you’ve left the regular 9-5 grind, how do you fund your yearly adventures?


I did a complete 360 and put aside the text books and literature to embrace my creative side. For the past three years I’ve worked as a professional cake decorator in a specialty shop here in Ottawa (my hometown). Not only is it fun, but it’s pretty flexible in allowing me to travel, even for a couple months at a time.


I’ve also been working on my freelance portfolio. I’ve always wanted to write and pairing that with my passion for travel is the ultimate goal right now. It’s a lot of work, and definitely not easy but I’m stubborn and will keep at it in the hopes that it pans out for me in the long run. Wish me luck!


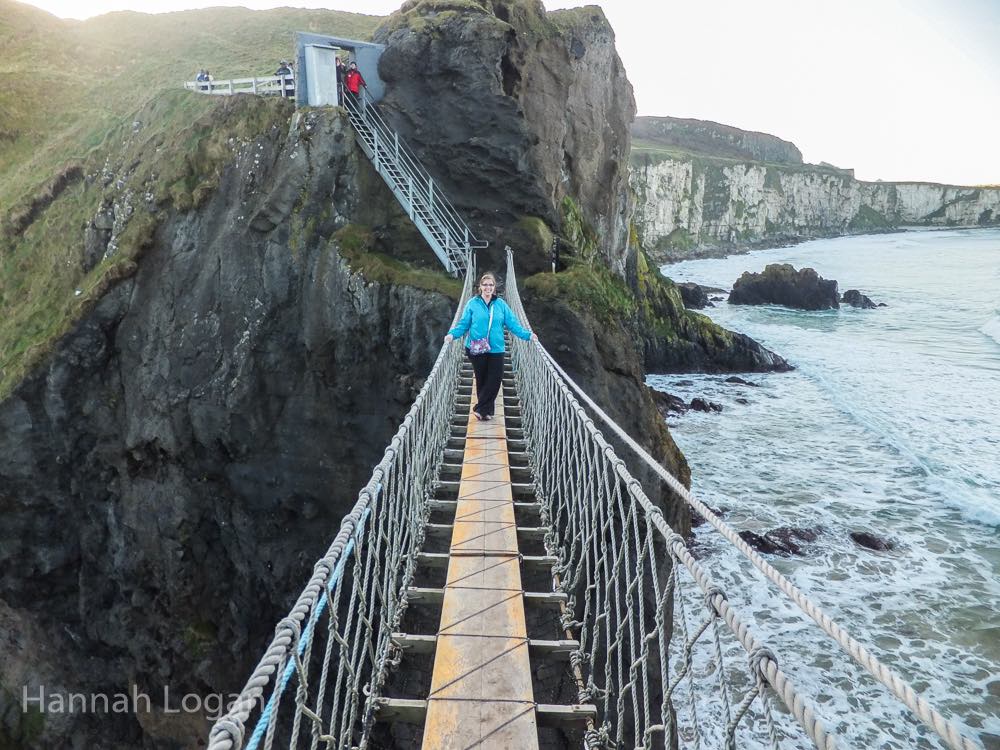
Carrick-a-rede bridge (1 of 1)


What was the most creative or weird thing you had to do for some travel money?


I ate a packet of ketchup at a pub in Ireland for about $10 Canadian. It was a dare from a group from Northern Ireland, and they were both amazed and disgusted that I did it. One of them even took a video. I have no idea why they were so grossed out. I love ketchup so it didn’t bother me in the least, and talk about easy money!


There are a lot of scary stories about females traveling solo.  Are these warranted, and what motivated you to give solo travel a shot?


I do think that caution is warranted, but I don’t think that travel as a solo female is as dangerous as everyone makes it out to be. I’ve been in a couple scary situations while travelling solo, but nothing that couldn’t happen to me here in Canada either. The good situations; the kindness of people I’ve met along the way, and the friends I’ve made, those far outweigh any negatives. I started travelling solo because I didn’t have anyone to go with, but with so many positive experiences, I now prefer it.


I can imagine solo female travel can put you in some dangerous situations.   What is one of the most intense situations you’ve ever gotten yourself in to and how did you get yourself out of it?


As mentioned above I’ve had a couple sketchy incidents, bar far the scariest was in 2011 in Belfast. I was out at the pub with a group of Scottish guys from my hostel who were in town for a work party. I spent most of the evening dancing and talking to the younger ones who were my age but when I left, their boss (probably twice my age) followed me back. He was drunk and incredibly inappropriate; he wouldn’t stop grabbing at me. For a little while I was actually afraid that he would try to sexually assault me. I ended up being able to get far ahead of him, but of course we were staying in the same hostel. Thankfully I was in a female only dorm which I had to myself. I actually barricaded myself in my room that night. Nothing happened- he passed out downstairs on the table, but thankfully they had to leave really early and I didn’t have to see him again.


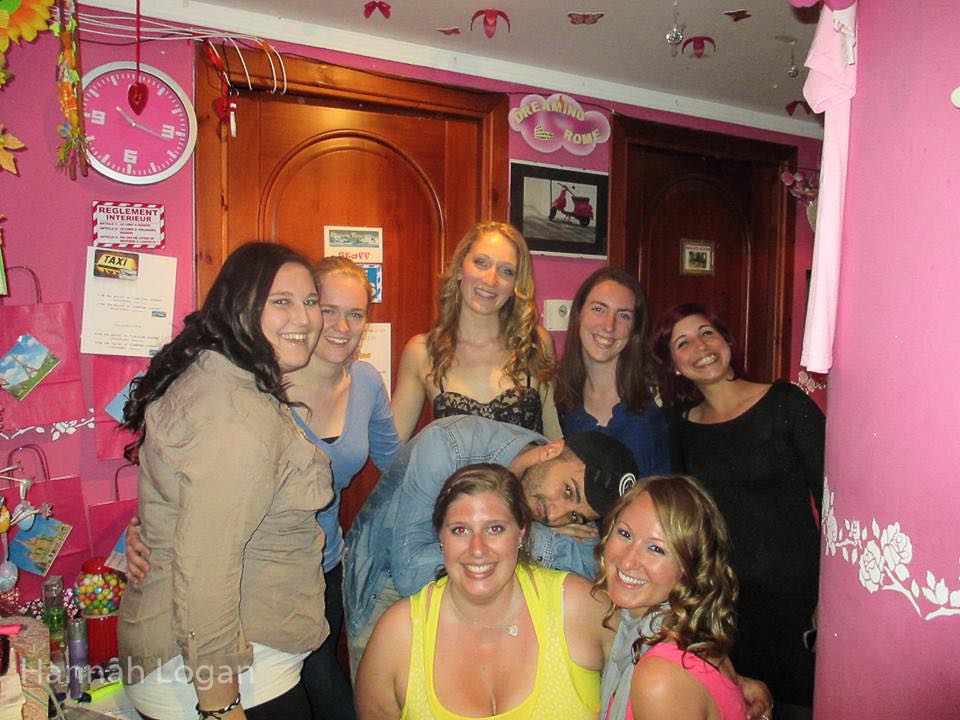
Hostel Friends (1 of 1)


Traveling solo for some people can be really intimidating, especially for those who are shy.  How do you go about breaking the ice, and make meaningful connections with others?


I am super outgoing and social. I have no problem plunking down at a table in a hostel and introducing myself, or joining in a conversation I hear and can participate in. One of my favourite go-to’s when I get somewhere new is to ask for advice on the area, it’s an easy way to start up a conversation. And, if I’m going out in search of dinner I’ll always ask my roommates, or whoever I’m with in the common room, if they want to come with me. In my experience, grabbing a meal with someone is one of the easiest ways to make friends.


If you could offer only one survival/safety tip for female solo travelers, what would it be?


It sounds cliché but women seriously have some type of inner alarm. I had a bad feeling when the guy in Belfast picked up his coat and walked over to me as I was saying goodbye. I should have asked one of the others to walk me back, or ducked out sooner. Women need to trust their intuition and, not be afraid to ask for help. Although there are a few jerks out there, everyone has wives, daughters, mothers, sisters and girlfriends too- no one likes to see a girl scared and I’ve discovered many times that people are quick and willing, to help.


I know you have a lot more adventuring left to do, but up until now, what is the most memorable experience/trip?


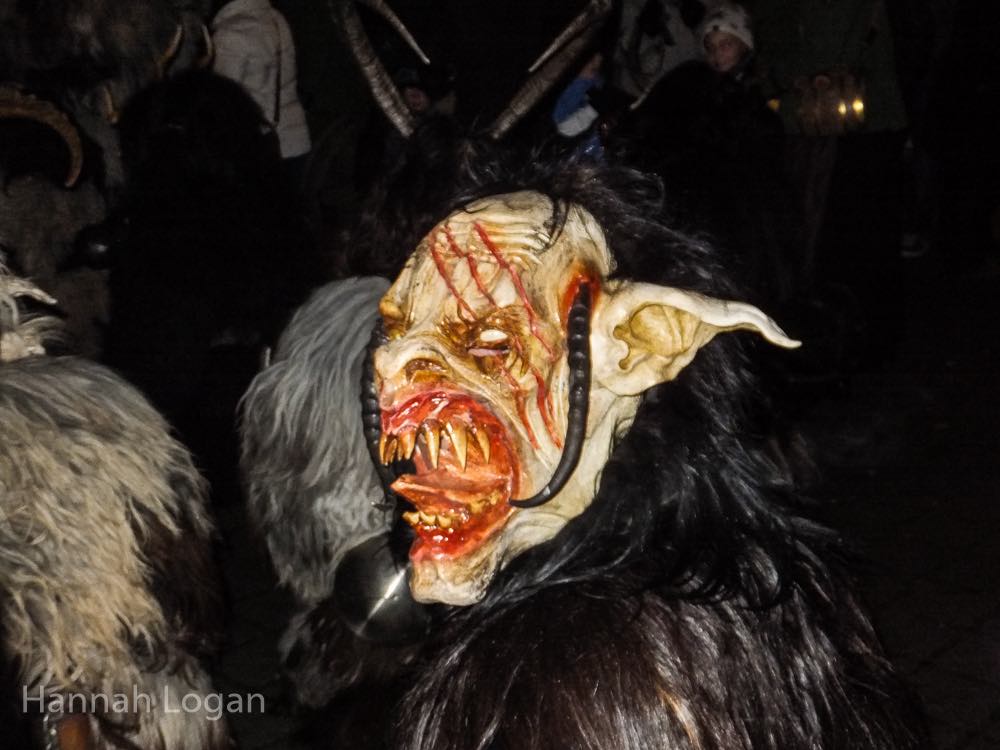
My first ever trip in 2011, when I lived in Ireland and travelled around Europe, will probably always be my most memorable. It sounds cliché but I learned a lot about myself; I was capable of taking care of myself and being independent. I made a lot of mistakes, missed planes and took the wrong trains, but it made me realized how strong I was and it made me braver. The coolest experience I had during that trip was just outside of Salzburg, when I inadvertently took part in an Austrian Christmas tradition telling the story of Krampus, a Christmas demon. I was the only foreigner there and quickly became targeted by the locals dressed as Krampus who chased me with their thick whips while I tried to take their picture. It was a bit startling because I had no idea what was going on, but I laughed the whole time. It was definitely a once in a lifetime experience that I was lucky to have stumbled into.


krampus (1 of 1)


Your one essential piece of travel gear you can’t live without?


That’s a massive toss-up between a journal and my camera. I guess if I had to pick, it would be a journal. I write in them religiously after every day while I’m travelling so later down the line I can look back and remember it all, it helps for my writing too. I also love the idea of being able to pass them on down the line, so when I’m old and senile my grandchildren (assuming I have a family) can know I was kind of a cool person.


You’re obviously no longer a “travel virgin”.  So, how have you evolved as a traveler from when you first started to how you are now?


I have learned a lot of things since I took my first trip from budgeting to something as silly as how to read a map. I really was completely clueless when I started. One of the biggest things I learned was what actually counts as a cheap flight. Being from Canada, flights are ridiculously expensive. So when I saw a roundtrip fare from Ireland to Scotland for $350CDN I jumped on it. HUGE mistake, I should have paid max a third of that. I spent a lot of unnecessary money those three months in Europe, just from not knowing any better.


I’ve also learned to slow down a bit. One of my travel friends told me I suffer from FOMO (Fear Of Missing Out) and he’s right. I tend to be somewhere new every couple of days; I want to see it all! Last year I spent an entire week in Nice and just did a few day trips, it was actually really nice to take it easy for a few days so I think I learned a bit from that and will slow down in the future. At least a little bit, but no promises!


Do you have any final advice for women who plan on solo female travel like yourself?


I think the hardest thing being a solo female traveller is the negativity attached with it. So many people warn me against going everywhere I look at, whether it’s for culture differences, stereotypes, or a variety of silly reasons. It’s amazing how many people think they know best just from reading a story in the news, when they have little or no actual travel experience to fall back on. My biggest piece of advice would be to block those people out and do your own research. You know your comfort levels and if you feel safe and ready to go- do it. Don’t let anyone tell you where you should and shouldn’t go.


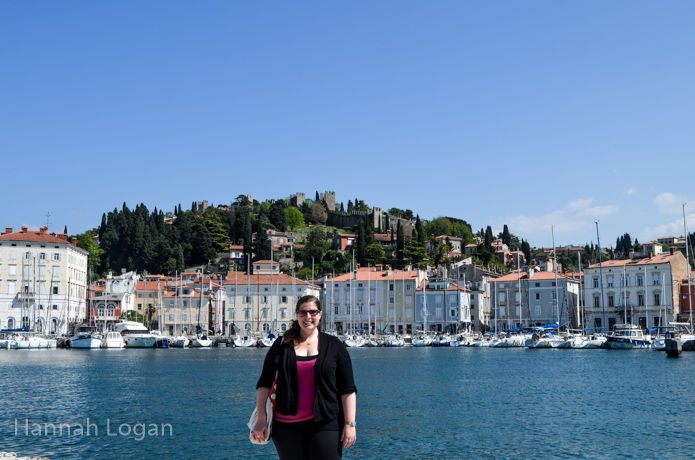
Hannah in Piran, Slovenia


Where will the road take you next?


Well isn’t that the million dollar question! I will be back in Ireland (where it all started!) in September; my old roommate is getting married so that will be one hell of a party. As for the rest… I’m not quite ready to share those plans as they are still in the works. What I will point out is that it has now been a year since I’ve been outside of North America, the longest stretch yet, so you can bet I’ve been saving for something…. Stay tuned!


About Hannah Logan

Eat Sleep Breathe TravelHi! I’m Hannah, a Canadian travel addict who has been dreaming of adventure since I first watched Indiana Jones. Travelling on and off since 2011, I’m on a mission to see the world. Will you join my (mis)adventures?


Hannah blogs over at Eat, Sleep, Breathe Travel.  You can follow her adventures on Facebook, Twitter and even on Instagram!


Adventure Series: Eat Sleep Breathe Travel

Monday, May 11, 2015

The Road to Nowhere - Cappadocia to Pamukkale

I couldn’t remember where I was.


Through the haze of deep sleep, I could hear the footsteps crunching on the cheap vinyl carpet. Somehow, through the fog, I knew those steps were coming for me. The bus lurched. The breaks squealed as they forced the bus to a painful stop. Was I in the right place? Did I somehow turn left instead of turning right? Maybe, perhaps maybe, I had gotten on the wrong bus. The events of the day unfolded quickly in my mind; about 7 hours ago my wife and I boarded a night bus from Cappadocia bound for Pamukkale. I was certain I confirmed with the ticket agent; double and even triple checked the number. No, I didn’t make a mistake.


I struggled to make sense of my surroundings, but the dim cabin lights magnified my displacement. Looking around at the other passengers, mostly locals, I could swear they were consciously avoiding eye contact. I had a feeling, they’ve been down this road before and that wherever we were, it was a place they certainly did not want to be. As I peered out the window, greeted by my own reflection, I could see only darkness. This sure as hell wasn’t the Travertine pools nor was it Denizli.


The Galley Master, looking convincingly like a bus attendant, addressed us in English laden with a thick Turkish accent, “Here, here.” Whipping us into line like sheep to the slaughter, he forcefully ushered us out the now open back door.  There were four of us in total: me, my wife, and two other women. Within moments, before we could realize what was happening, we were standing alongside the bus, watching the driver grab our packs and toss them haphazardly unto the roadside, all while ignoring our silent protestations.


I grabbed the Galley Master’s arm as he turned to walk away, hoping to force a conversation or the very least an explanation. With a surprising deftness, probably honed from previous victims, and in one well-rehearsed movement, he shrugged off my hand, jumped on the already moving bus, turned and said, “Here, wait here.”


“Wait here? There’s nothing here,” I responded to no avail.


As we watched the bus roll away in the darkness the four of us shared a glance. Words were unnecessary at this point, but we knew what we were all thinking, “what the fuck just happened?”


We were in an empty lot, surrounded by trees on all sides. Besides the few crude wooden benches dotting the edges and a couple of randomly placed street lamps, the lot was unremarkable. About 100 feet away, a group of Turkish men stared at us with a mild curiosity. Periodically they would take drags off their cigarettes to remind us of their indifference.


We were in the middle of nowhere.


I’ve been stranded before. Being a seasoned backpacker, this certainly wasn’t my first rodeo. I’ve hitchhiked, I’ve trekked, and I had no reservations about asking help from strangers. But this time it was different.


I could hear the disembodied growls all around us. It happened fast.  Within heartbeats, the shadows came alive with a pack of rabid wild dogs. Like predators sensing weakness, the dogs circled, jostling and pacing for a better attack position. With little effort, I instantly spotted the Alpha; a big muscular hellhound, with glistening yellow teeth, whipping saliva with each bellow. This was no ordinary run in with strays. Instantly we went on the defense. The women formed a tight defensive circle, stepping as high on the benches as was possible; I grabbed my bag, holding it in front of me as a shield. The pack continued to circle, brandishing their teeth, howling intermittently as though calling for action. I bluff charged, I yelled, but this only served to aggravate them more. We braced ourselves, as the attack seemed imminent.


Suddenly, we could hear loud whistling, followed by even louder yelling. From behind us, the three Turkish men dropped their indifference and charged, attacking with rocks and cigarette butts. The dogs attempted to mount an offensive. But in the face of greater aggression, the pack scattered running back into the shadows from whence they came. Clearly, these men have dealt with their kind before.


Perhaps we were meant to wait for another bus, or perhaps we really were left stranded. Looking back, it no longer really mattered. What was expected to be an uneventful bus trip from Cappadocia to Pamukkale became one of our fondest memories. In the end, the three men not only pulled us from the fire, but also helped us arrange a ride to take us the final few hours to Pamukkale. For my wife and I, this was the reason we traveled. In the place we least expected, we were given a peek behind the curtains and experienced the genuine kindness and generosity of the Turkish People.


If this was nowhere, I’ll take that over somewhere any day.


The Road to Nowhere - Cappadocia to Pamukkale

Friday, May 8, 2015

Travel Hack Friday: How to Make a Paracord Belt

Welcome to Another Travel Hacks Friday. As part of a new series, every Friday, we will be introducing new travel hacks for outdoor and urban adventures. We will scour the web for the best and most practical hacks, as well as dig into our reserves and share our own awesome moments of ingenuity!


Paracord is such an amazing and useful piece of gear, that in order to do it justice, I’m going to split this hack into 3 parts.


For those who’ve ever needed to hang a bear bag, or rig a safety line, you know dental floss just isn’t going to cut it. Rope, or some form of it, is an underrated item often overlooked by travelers aiming to be lean and mean! Unfortunately it’s also one of those items we never realize we need, until we need it.


I don’t blame you though, if my choice were between carrying a backpack or 50lbs of rope, the backpacks going to win out every time. For the ultimate outdoor survivalist, you could learn to make rope out of plant fibers, but this is time consuming, and in most cases a last resort.


A better, and far easier, solution would be to go and get you some paracord.


I’m talking about lightweight, high tensile strength paracord, also called parachute cord, utility cord or 550 cord. The same type of cord used to suspend parachutes. Paracords have been used amongst the military for some time now, and is fast becoming standard issue amongst campers and outdoor survivalist for its strength and versatility. Even for backpackers and casual travelers paracord has a plethora of uses and not just for survival situations.


A kernmantle rope made of braided Nylon or Polyester sheathing, and a high number of interwoven strands within (also known as the “guts”) paracords are strong, small and super lightweight. The cord inherently has a high-tensile strength of 550lbs (hence the name). The polyester versions are essentially the same, and sometimes have an even higher tensile strength.


paracord belt


Like conventional ropes, paracords can secure, lash, pull, lift, and strap, but unlike standard ropes, paracords can be further stripped down and its fibers inside be further used for gear repairs, fishing lines and yes, even dental floss.


Best of all, paracord can be styled into wearable accessories like belts or bracelets, so you needn’t sacrifice precious bag real estate. Seriously, your friends will be green with envy.


For the first part of this weeks hack, I’m going to show you how to make a paracord belt.


How to make a Paracord Belt


Materials/Equipment


  1. Buckle

  2. Paracord 550 (length will depend on waist size. I recommend 50ft minimum)

  3. Lighter, scissors

paracord belt


We opted for the buckle whistle from REI, but there are a variety of buckles available depending on personal preference. Also, the length of paracord needed will depend on your waist size. To give you an idea, for every 1 foot of paracord, you’ll get approximately 0.64 inches.


1. Cut to length and seal the cut end(s) of the paracord by burning with a lighter to stop the fraying


2. From left to right, thread the paracord through the buckle creating 4 loops going under over and fasten the end of the cord to the buckle to keep it from unraveling


paracord belt


3. Form a loop with the trailing end and thread it through the 4 loops from step 1, leaving a couple edges hanging off the right end


4. Tighten the 4 loops from right to left


paracord belt


5. Slightly spread apart the 4 tighten loops just enough to pull out the tail end of the cord you thread through in step 3 to form 4 more loops


paracord belt


6. Turn the loops counterclockwise so the left of the loop is facing you


paracord belt


7. Form a loop with the trailing end again and thread through the 4 new loops, leaving a couple inches hanging off the right end like step 3


8. Tighten from right to left again, pulling on the loop hanging off the right end to tighten the last loop on the left (if your loop on the right becomes too long, just pull on the trail end of the paracord to the desired size)


paracord belt


9. Rinse and Repeat until you get to your desired belt length.


10.Once you’ve reached your desired length, grab the buckle end (make sure it’s facing the right way so it can clip to the other side)


paracord belt


11. Pull the hoop hanging off on the right, until the trailing end comes through all the way through


paracord belt


12. Slightly spread apart the 4 loops


paracord belt


13. Loop the trailing end of the paracord to the buckle end, over under


paracord belt


14. Thread the trailing end through the first loop on the right and then back over through the buckle


paracord belt


15. Repeat until threaded through all 4 loops,


paracord belt


16. Tie off the end in a simple knot.  Alternatively, you can thread it through anywhere in the belt, cut the excess and seal the frayed end with a lighter.


17. Now admire your new Fashion Accessory – The Paracord Belt!


paracord belt


If you want to increase the length of cord used to make your paracord belt, or need a larger, or even smaller waist size, you can change the number of loops per row.  So instead of using 4 loops like this tutorial,  3 loops would make the belt longer and thinner, whereas 5 loops will make the belt shorter and wider.


Lastly, to unwind, simply undo the buckle end you just completed, and pull the trailing end back through the loops to the left, and pull. That’s it.


Read my post next week to learn how to craft a Paracord Bracelet.


paracord belt


Travel Hack Friday: How to Make a Paracord Belt

Wednesday, May 6, 2015

Adventure Series: The Broke Backpacker

Every now and then you’ll come across someone whom you know there just isn’t enough road on this earth for them to travel. A full-time adventurer, photographer, travel writer, and all around ass kicker, Will Hatton over at The Broke Backpacker is one of those people where Mother Nature herself seeks him out to see what he’s made of. Will is the Chuck Norris of adventure travel, the very embodiment of the adventuring spirit, blazing trails where there are none, and going where danger is a stark reality.   When not risking his life scaling peaks, slogging through uncharted jungles, or practicing his round house kicks, you’ll find him over at his blog regaling us with incredibly captivating stories along with actionable advice on how you can also live a life of travel. If you’re not already following him, you probably should…


Tell us a little about the Broke Backpacker.  Who are you, what are you all about, you’re first introduction to traveling, and how long have you been kicking ass and taking names on the road?


Hi! My name’s Will and I’ve wanted to be an explorer ever since I first watched Indiana Jones as a kid! I’ve been on the road for about seven years, I first started when I was eighteen and I climbed Kilimanjaro, summiting on my birthday. Since then, I’ve taken every chance I get to explore this amazing world. I first started, very casually, writing about my travels a couple of years ago. 9 short months ago I decided ‘screw it, I want to be a professional travel writer’ – something which is going extremely well at the moment. I’ve been able to make money out of my site for the last three months, enough to fund my lifestyle, and I’ve even been published by news.com.au!


mug1


We all dream about dropping everything and traveling. What was your inspiration to leave the 9 to 5, get into backpacking and commit to traveling as a lifestyle?  


For me, it wasn’t a hard decision. I never really had a 9-5. Sure, I had jobs, but they were temporary, manual labor, grunt work – I enjoyed some of it but I was never there for long, the aim of the game was to save money up so I could hit the road again. I did have a brief stint working as a travel agent and itinerary designer; this was the closest thing I had to a proper job. I lasted about a year before my itchy-feet forced me to move on!


I know you’ve recently come into some wealth in Venezuela, but when not paying in Bolivars, how do you afford long-term travel?


Wow, yeah – Venezuela is the cheapest country I have ever been; about a third of dirt-cheap India! In general, I try to pick cheap places, such as India, Venezuela, Nepal, The Philippines, Cambodia and Nicaragua to travel; I can last longer and see more but I do tend to just go wherever I want. I hitch, couchsurf and grab random jobs on the road to help keep myself going. Now that my writing is going so well, I’m hoping to fund my travels indefinitely through my website and freelance work.


money-1-690x388


What are three steadfast rules that you abide by in order to stay on budget while backpacking?


Don’t drink too much! Seriously, the amount of money that some backpackers spend on partying is just insane. Don’t get me wrong; I LOVE to party, but have a few pre-drinks rather than exclusively buying expensive cocktails in bars. I also try to hitch wherever possible and I very rarely pay for accommodation; I couchsurf, camp or, more recently, score freebies in exchange for a shout-out online.


You have some seriously awesome adventures stories that certainly can’t be found in any guidebook, what is your trick to really dig into a culture and destination?


Time. On my most recent travels, I met people who were attempting to see ‘All of South America’ in six weeks – that’s impossible. You’re better off sticking to one country and really getting to grips with it rather than going on an international-airport tour. Sure, some people are really addicted to ‘bucket-list’ travel in which they try to tick off every ‘life-changing’ experience and see every world wonder in one fell swoop – I get the attraction, many people don’t have the kind of time I have and want to cram in as much as possible but, seriously, there is so much to do in Colombia, for example, that trying to see an entire continent just comes across as a bit insane, you will lose so much time and money on the crazy distances.


web4


You’ve had some close calls and lived to tell the tale.  What is one of the most intense situations you’ve ever gotten yourself into and how did you get yourself out of it?


Oh wow! Well, there are a few for sure. I seem to have a gift for walking away from disasters in one piece. I’ve been stripped naked at gun-point, crashed several motorbikes, had a knife pulled on me, found myself dangling over a 1000 meter drop, been evacuated from tropical jungle and survived a year of Indian food! Probably one of the more intense situations was in Costa Rica; I got badly injured in the jungle and then spent two weeks in hospital, I thought I was going to die; it was a truly bad time, I did get out of it – unfortunately with a life-changing injury – and it made me a bit more aware of my mortality… I still kind of think of myself as indestructible though.


If you could offer only one survival tip, what would it be?


Note the exits; always know the fastest way out of a situation and get away from brewing trouble before it explodes.


samurai


I know you’ve got a lot more adventures in that tank of yours, but up until now, what is the most memorable experience/trip?


I very recently climbed Mount Roraima, in Venezuela, the highest table-top mountain in the world and the inspiration for Arthur Conan Doyle’s ‘Lost World’ … the climb was tough but the stunning views at the top were well worth it.


Aside from visiting amazing places, being on the road is about making meaningful connections with others.  And if your blog is any indication, I know you’ve met some really amazing people. How do you go about breaking the ice?


I’m a pretty friendly guy, I’ve met life-long friends, lovers and brothers (from another mother) on the road; I normally just keep an eye out for other solo travelers and invite them for a drink or a game of cards.


How have you evolved as a traveler from when you first started to how you are now?


When I first started I was one of the shyest kids in the world, travelling allowed me to get away from a not-particularly brilliant childhood (I never had many mates in school) and to re-invent myself. The guy who I am today is a far cry from who I was seven years ago, I feel more confident, I like myself; travelling has given me pretty much everything I could ever want; new experiences, faith in my self and a huge network of wonderful friends.


will-and-ben


Ok, this is for all the gear lovers out there. What is the one essential piece of travel gear you must have on your adventurers?


Only one? Hmmm… a knife. I also always have a head-torch handy… I like to crawl around in caves.


What kind of trouble are you getting yourself into at the moment, and where will the road take you next?


Haha, right now? I’m preparing to head off to the Philippines for a month of island hopping, mountain climbing, and cave-traversing madness…


Do you have any final advice for those who wish to live a life of travel?


Just do it. If you spend your whole life waiting for the perfect time, the perfect companion or the perfect place to go travelling, you may never go. Book that ticket, shoulder your bag and prepare for the adventure of a lifetime.


181565_500009318298_503588298_6052239_6497932_n


About Will Hatton


WillHattonBioWriter and photographer. Adventurer and vagabond. Master of the handstand pushup. Conqueror of mountains, survivor of deserts and crusader for cheap escapades. Will is an avid hitch-hiker, couch-surfer and bargain-seeker. He is a devout follower of the High Temple of Backpackistan and the proud inventor of the man-hug. Will blogs over at www.thebrokebackpacker.com about his adventures around the world, you can follow him on Facebook  and on twitter  or, if your really friendly, hunt him down on the road for a cheeky pint.


Adventure Series: The Broke Backpacker

Monday, May 4, 2015

Derinkuyu Underground City

Below the surface of Cappadocia’s famous landscape of valleys and fairy chimneys, lay the remains of over 200 massive subterranean metropolises. The first recorded evidence of these underground cities was discovered in Xenophon’s famous work Anabasis where he writes, “ the houses where underground, with a mouth like that of a well”.   Carved out of the soft volcanic tuff during the 7th to 8th century by possibly the Phrygians, these underground caverns formed a network of tunnels, and hidden rooms, for purposes still shrouded in mystery.   It was not until the 6th to the 14th century that the caverns where repurposed as underground defensive cities by the Byzantines and later on by persecuted Christians.


For myself, the underground cities were something I had to see. I wasn’t exactly sure what to expect as I’ve been to quite a few caves in my travels, such as the Carlsbad Caverns, and the Paleolithic Caves of Southern France. Some were certainly more noteworthy than others, while others were just holes barely suitable for even animals. However, the caverns of Cappadocia where billed as “Underground Cities” and unlike most caves, were created by man, and unlike most cities, was also sculpted exclusively from rock.


Most Popular: Derinkuyu Underground City


Of the many subterranean cities throughout the Cappadocia region, the two largest and most popular are Kaymakli and Derinkuyu.   There are quite a few off the beaten trail, but if you could only choose one, Derinkuyu would be your best bet. Derinkuyu is by far the largest and most vast, extending 7 levels deep (unfortunately, this number seems to be in contention, but lets go with 7), but with only a few open to the public.


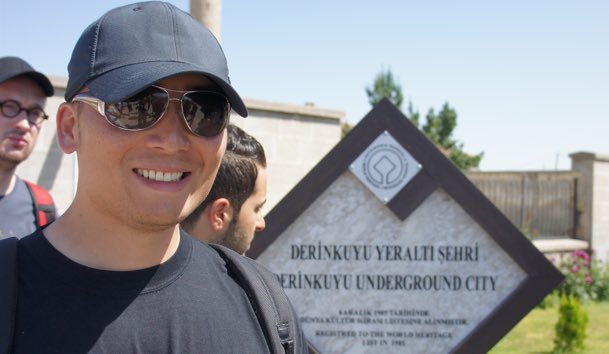
derinkyuy underground city


When first approaching Derinkuyu Underground City, don’t be thrown off by the unassuming entrance as it belies what lies beyond. As you descend, you’ll immediately notice the coolness with respective to the heat above, and a smell not particularly stale, but earthy. The ventilation shafts throughout the system are surprisingly effective in keeping the fresh air circulating. The second thing you’ll notice is the labyrinth like maze of narrow tunnels that open into chambers of varying sizes only to lead on into more tunnels. What’s unique to Derinkuyu is the ceiling height of some of the rooms and how unbelievable cavernous some of them can be. Although hard to imagine, each room was developed for a purpose for things like stables, storage, kitchen, and even temples and churches. But you’ll probably have trouble determining that purpose without a proficient guide. As much as we all like doing things independently and are inherently skeptical when it comes guides, consider it for Derinkuyu only because the narrative provides context to what you’re looking at.   Guides can generally be hired at the entrance.


Overall, even though Derinkuyu was claustrophobic at times, and the crowds could stretch your patience, it should not be missed. The underground cities are definitely not for everyone, but for us, it was an opportunity to glimpse into the past and get an idea of the motives and desperation that drove an entire civilization underground. The underground cities represent critical moments in Cappadocia’s history. Don’t let the crowds keep you away from what is otherwise pretty amazing.


derinkyuy underground city


How to Visit Derinkuyu Underground City


Where: 36 km south of Goreme


How: Local bus from Goreme to Nevşehir. Nevşehir-Niğde


to Derinkuyu (2 to 3TL), or rent your own transportation to get out there.


Hours: 8am to 5pm


Cost: 15 to 20 TL


Best times to visit: early in the morning, 12:30 to 1:30 or at 4:30pm last admission.


Derinkuyu Underground City

Friday, May 1, 2015

Travel Hacks Friday: How To Find True North

Welcome to Another Travel Hacks Friday. As part of a new series, every Friday, we will be introducing new travel hacks for outdoor and urban adventures. We will scour the web for the best and most practical hacks, as well as dig into our reserves and share our own awesome moments of ingenuity!


For most of us, the need to find True North is an unnecessary skill; a lost art replaced by GPSes and Smartphones. But even technology has its limitations. So unless you happen to have your own portable solar panel (which begs the question of why you don’t have a compass), or discover an outlet or power source in the trees somewhere, learning some handy navigation techniques could get you home safe and sound.


As you channel your inner boy scout (or girl guide) you’ll certainly remember the rule: if ever lost, find the brightest star in the sky, and that will be your guide. Simple enough right? In theory finding the North Star is sound, but given that it’s not the brightest star, but in fact the star that doesn’t move, you’ll discover finding a single star in a sea of shining stars is easier said than done.   You could rely on your memory of constellations (it’s the last star in the handle of the big dipper) but if you’ve ever been out in the wild, under a clear night sky, you’ll understand how difficult it really is. To complicate things, if you happen to be in the southern hemisphere, you’ll need to use the Southern Cross method to find south, and not the North Star.  And what if it just happens to be a cloudy night or the middle of the day? Survival hacks, like making your own compass, could also work, but do require access to at least a little bit of gear (Sorry Bear Grylls, magnetizing your hair does not work!!).


So, assuming you’ve been dropped off naked, and you’re up the creek without a paddle so to speak, this weeks travel hack will set you in the right direction literally.


Also, before you think that you’ll never be in the backcountry and this hack is only for the wannabe John Muirs of the world, know that being able to find True North will also help with map navigation in the city, on the road, and virtually everywhere else. Maps are only useful if you know the direction of North (North is up on all maps).


Before I get to the hacks, some additional things to note:


  1. Finding North doesn’t mean to head North. It’s simply a bearing to know where South, West and East are in relation

  2. Before heading out into the wild, have an idea the cardinal direction you came from. For example, if you’re walking east, to get back you’ll have to head west

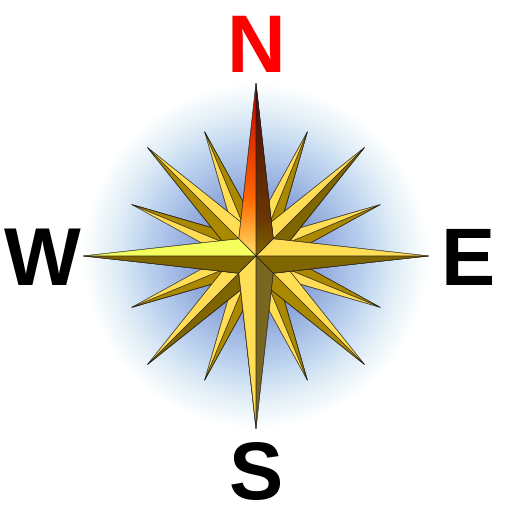
  3. The cardinal points spell NESW in a clockwise direction


how to find true north

Image Courtesy of Patrick87


How To find True North Method 1: Sun Rises In The East, Sets In The West


Materials/Equipment


  1. The Sun

The most basic method to use in a pinch is knowing the Suns behavior. It’s not full proof and lacks precision since the Suns position depends on season and latitude, but it’s better than nothing.


  1. The Sun rises in the east

  2. The Sun sets in the west

  3. North will be to the right of where the Sun sets

How To Find True North Method 2: Look For Moss Growth On Trees


Materials/Equipment:


  1. Moss

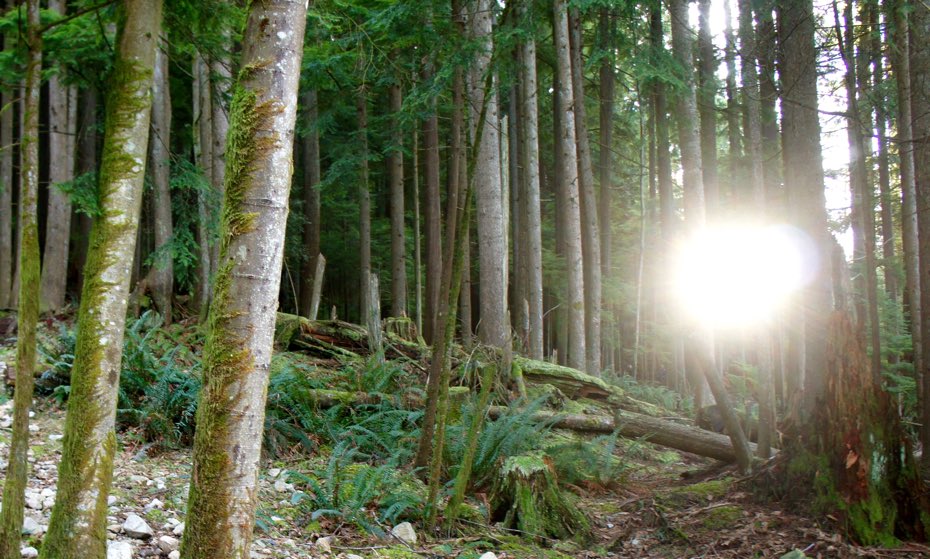
Unlike typical flowering plants, moss grows abundantly in damp or shady areas. However, moss has the habit of growing anywhere it chooses, and so it’s important to observe and notice the small differences such as, moss on the south side being greener, and the moss on the north side being denser and more plentiful. As a rule of thumb the North side has the least amount of Sun.


how to find true north


  1. Look for moss growth on trees and rocks

  2. Determine where the moss is most dense and plentiful

  3. The side with the most moss will be True North

How To Find True North Method 3: The Watch Method


Materials/Equipment


  1. A watch with dials and an hour hand

  2. The Sun

Surprisingly a watch serves more than just as an accessory. For this method you’ll need an analog watch with an hour hand.


how to find true north


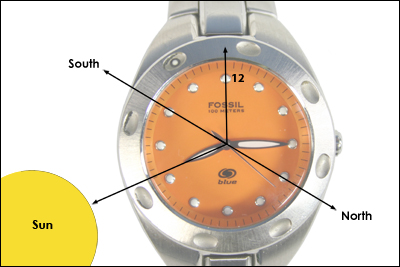
  1. Point the hour hand at the Sun, and draw an imaginary line from the sun to the center of the dial

  2. Draw an imaginary line from the center of the dial to the 12o’clock position

  3. Draw another imaginary line halfway between the hour hand, and the 12 line, crossing through the center

  4. The line within the angle will be pointing south

  5. True North will be the line pointing on the other side of the angle

For those in the Southern Hemisphere, you’ll point 12 at the sun instead, and replace the 12o’clock position with an imaginary line between the hour hand and the 12. North will also now be the line in the angle


How To Find True North Method 4: The Shadow-Tip Method


Materials/Equipment


  1. Stick

  2. 2 rocks

  3. Open area

  4. The Sun

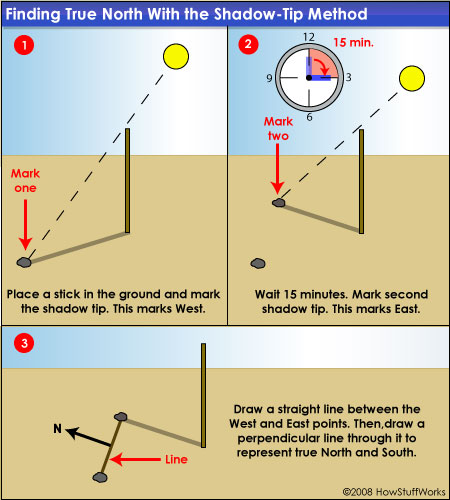
Using the sun and its relation to the rotation of the Earth, you’re able to get an approximation of the cardinal points. If you happen to not have anything that can be used as a stick, you could also use any fixed object that casts a shadow. But be aware, the finer the point of the stick, the more accurate the reading.


how to find true north

Image Courtesy of HowStuffWorks


  1. Stick the stick (yes I said it) in the ground

  2. Note where the shadows tip ends and mark it with a rock

  3. Wait 15 minutes. The shadow will move west to east

  4. Note where the new position of the shadows tip, and mark it with a rock

  5. Draw a straight line between the two rocks. This will be your West to East Line, with the first rock being West

  6. Draw a perpendicular line right of the West Rock

  7. That line will point towards True North


There are more precise methods that can even determine latitude, but those methods are generally impractical in survival situations with minimal gear or are far too complicated to recall easily in an emergency. Also, the methods only give approximations of how to find True North and should be used as your last resort. As with all things, preparation is key.


Now go buy yourself a compass.


Travel Hacks Friday: How To Find True North